New Unionville & Western Railroad
Last winter we moved our building activities into the shop. It was time to get serious about building track switches. We have a few switches already installed but we need more badly. We had put it off as long as we could. All of the advice we had been given was to think big. Because of the time it takes to stock pile fabricated parts before any assembly can take place we decided to make that time count. We decided to mass produce enough parts for 106 switches as we were developing the first one in the new fixture. Kent is our master fixture and jig maker. He has produced several different labor and time saving drill jigs and fixtures for holding parts while drilling. He is not only a good friend but our greatest asset. He keeps us on our toes making quality parts.
We meet for breakfast at the local Cracker Barrel and then we head for the shop to tells stories and make parts.

Each switch takes 25 ties, so the first operation was to have a couple of marathon days of cutting ties on the radial arm saw...2650 ties to be exact.
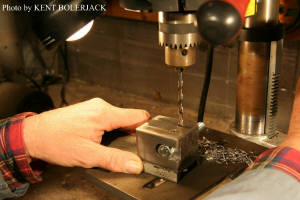
Availablility of 106 - #9 frogs became an issue. So we had our own frogs cast. We decided we did not like the way the average frog tails broke off after a period of time. So we changed the design of our frog to eliminate the tail. We drill and tap a 7/16" hole in both ends of the frog and insert a bolt with two holes to fasten the rail to. With a little magic shimming it is stronger than any cast aluminum frog and the tails will not crack or break off.
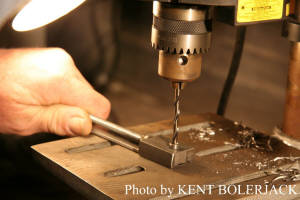
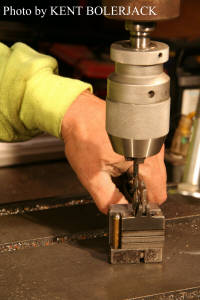
View of the 7/16" x 3" bolt in the drill jig being drilled and removed with the two holes in correct place everytime. The next step is to install them in the ends of the frogs.
106 frogs drilled, taped with the bolts installed ready for rail.
After getting the rail pieces the length we wanted them in the prototype switch it was time to mass cut rail, and cut we did. Each switch takes about 30' of rail. So we cut 3180' feet of rail for our pre-cut rail rack.
Clarence Cochran is attaching bar stock to 4 ties for each switch. The straps hold the points off the tie just enough that the points move freely on the tie. He sub assembled 424 of these ties before switch production began.
We needed a total of 824 pieces of various lengths of 1/8" x 1/2" and 3/4" bar stock with holes in each end. But there were 5 different lengths with holes to be drill in that manner. This is one of Kents drill jigs. This one is adjustable not only for the length of the bar stock strap but also for the different widths of the bar material.
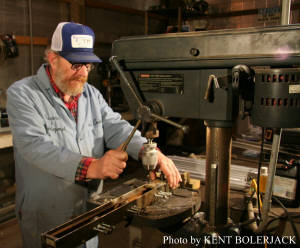
Here is Dr. Donnie Cain and Professor Kent preparing to drill holes the switch throw mechanisms
The points take 4 pieces of different lenghts of bar stock to keep the points at the correct track guage whether the switch is set for the turnout or the straight through track. Kent is checking a part here for fit before we cut and drill 106 of them.
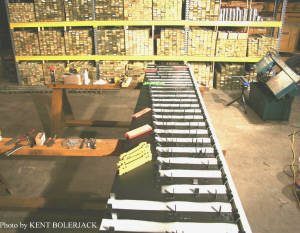
Mass Production Switch Fabrication
The first order of business was to build the prototype switch and fixture for mass production.
This is what the fixture looks like before the ties and rails are inserted for assembly.
Here is Donnie on another day drilling one hole in each switch throw for a cotter pin to be installed for a stop mechanism on the lever.
Note the small drill jig being used to keep the bit centered on the round shaft of the switch throw.
This little drill jig is adjustable. Each of the 4 bars between the switch points gets one hole in the same location on the end that attaches to the straight switch piont. But each one is a different length because of the curve in the opposite switch point. So the jig has a peg that indexes itself in the first hole and is adjusted for the second hole on the other end accordingly.
This complicated drill jig Kent made is for the left and right switch points. The bottom of the channel milled into switch points must have 4 holes drilled along the length for the bar stock separators mentioned above. This drill jig allows for the point to be inserted in exact steps. This dictates that the holes will be drilled at precisely the location desired on both the left and right points.
This drill jig was for drilling 812 holes in 412 spacers. These spacers for aligning the rail with the switch points and their connections. Note it is made to drill 3 - 1/4" or 4 - 3/16" spacers at one time for mass production.
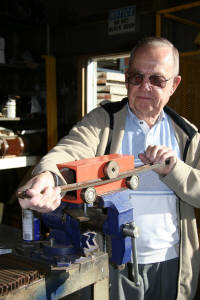
Clarence is running switch points through the rail bender that Kent custom build to bend all of our curved rail and switch points.
Pete is bending rail for the switches. When mass producing bent rail for curves we can attach an impact gun to the main shaft and turn out hundreds of feet of perfectly curved rail in a matter of a few minutes.
Here Kent is sub-assembling switch points to closure rails. These assembled units make the production of the switches go very fast. We can assemble an entire switch in less than 1/2 hour.
Mission Accomplished 3-11-09
On March 11th a work group met and finished the last few switches of the production run of 106 new switches. Below is Number 106. Left to right: Pete Pedigo, Kent Bolerjack and Andy Russell. Others involved in the switch producton, but not present this day were Don Cain, Clarence Cochran, Mike Jenkins, Rick Jenkins and Bill Lesburg.
See below for detailed pictures of the process.
Andy and Kent are fastening the rails to the ties in the fixture.
Pete is drilling the holes in the outsides rails for the guard rails
aaaaaaaaaaaaiii